TECH TORQUE : Fitting a snorkel to the R1200GSA
Tech Torque : Fitting a snorkel to the R1200GSA
This tutorial shows how to fit a permanent adaptor and a removable snorkel for deep water crossing
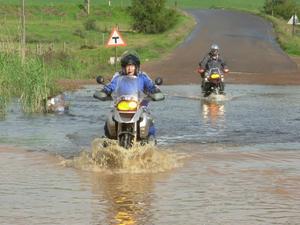 Water crossings need not be the turn around point
This is a DIY you can do yourself.
Read this tutorial, end to end a few times before commencing!!!
If your riding takes you as mine so often does through terrain where water crossings and swift flowing water is very possibly on your path, then this adaption is a must!
It means I do not turn around when confronted by a water obstacle.
Follow this step by step DIY process and fit a 40mm snorkel adaptor to your air intake horn and a make a snorkel to fit to this adaptor.
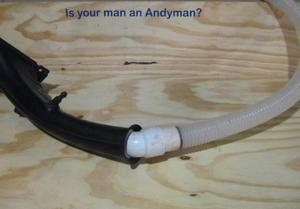 Air intake horn and snorkel arrangement
This adaption can be permanent or removable. I chose to fit permanently after months of using it in the removable mode.
Now I simply plug in the snorkel and I am water worthy in minutes.
The snorkel is always only fitted for the water obstacle and removed after the obstacle/s.
It is super fool-proof fun to cross water knowing you will not ingest into the air-box and subsequently the engine
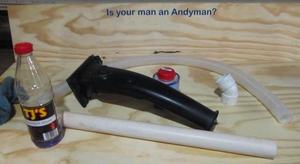
A 700 mm length of vacuum cleaner hose or pool cleaner hose.
A 40mm drain pipe.
A 40mm bend piece with the 22.5ºangle.
Pvc cement.
Sandpaper.
The 40mm drain pipe: Cut a 70mm piece off, this is all you require.
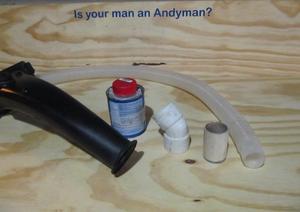 Clean the angled pipe connector, the pipe stub and the hose end with spirits
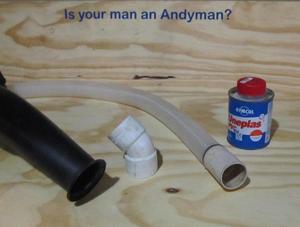 Apply the pvc cement thinly and insert the hose end into the stub, gluing it fast.
Allow to dry, takes ± 10 minutes.
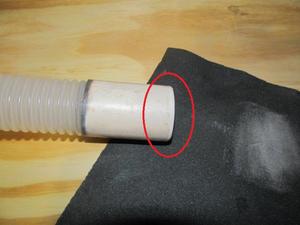 Using sand paper, chamfer the end to a soft bevel. This will aid you in fitting the snorkel to the bend piece.
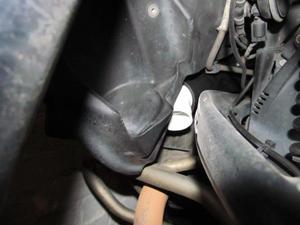 Refit the air intake horn with the pipe bend inserted to its limit.
Remove the side panels on the RHS, unclip the air intake horn and gently prize it off the rubber mount and remove it.
Clean the air intake horn thoroughly.
Practice inserting and removing the angled pipe bend several times.
Fit it in as deep as it can go.
Lubricate it with some light oil or soap.
Twist the pipe bend to orient it to where you can most easily push the hose stub into the pipe bend.
Repeat this until you are happy it can be done every time.
This step is important. The orientation must allow the snorkel to enter from below the wishbone and avoid contact with the wishbone travel.
Fit he snorkel to ensure you get this angle right
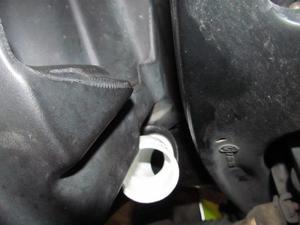 This is now the position you will cement it in place to, if you choose to make this a permanent application.
You can actually squeeze the pipe bend in from the front, you can even do this quite easily after many attempts.
This is now the position you will cement it in place to, if you choose to make this a permanent application.
However you will have to carry this adaptor somewhere in your kit or fitted to the snorkel on each trip.
I eventually decided it worked best for me as a permanent fitting, as it impedes air intake flow very marginally.
Now fitting the snorkel is a easy, user-friendly process requiring only a minute or two.
The snorkel can easily be carried in your luggage
without fuss, and be put in a ready-use place when you anticipate a water obstacle on the ride.
I use soft luggage and stow the snorkel easily.
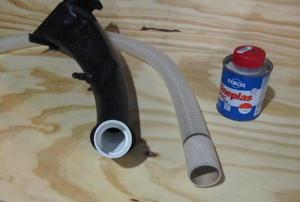 When you are certain you have the correct orientation, leave the bend in situ & remove the air intake horn once again
Mark the alignment by notching the horn end where the pipe mould seam line is so you can fit it in the same place.
Clean with spirits & cement in place.
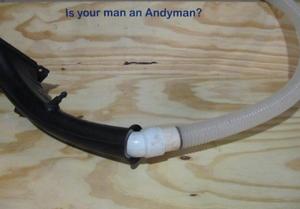 You will have noted these products were found to have the most snug fit with the smallest profile.
You will also notice that when assembled, the fit is water-tight. You will not ingest water via the air intake horn.
The snorkel is inserted easily, even by feel, not sight.
The snorkel comes under the wish bone and the wish bone travel action does not pull the hose out of place.
Beware of the hot exhaust pipe
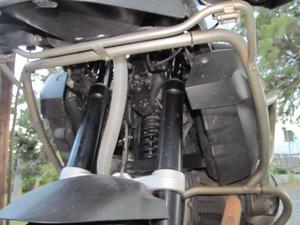 Feed the snorkel up between the stanchions.
Swing the steering through its full travel arc both left and right to ensure the snorkel does not snag on anything or rub and wear.
It must be free of contact with moving parts.
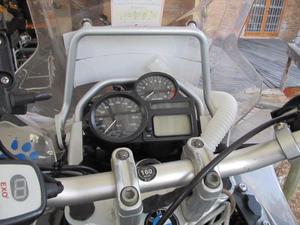 The snorkel can be tucked away out of direct path of dust or rain.
I always disconnect it once I am done with water obstacles as the snorkel does impede air flow and does reduce engine efficiency if travelling at speed.
This entire project took me not more than one hour to complete, end to end.
Once I discovered the 40mm plumbers drain pipe was the perfect fit to the air intake horn, I took the stub with me to several hardware and DIY stores and found the swimming pool cleaner hoses were a perfect tight fit into the stub. No machining or McGuivering was required.
No special tools.
I now stop, fit snorkel, & ride water crossings with confidence .
The snorkel has become part of my riding gear, packed on every ride.
MASTER CAUTION.
After every water crossing it is prudent to stop after a kilometer or so and look at the oil sump level sight glass.
You are looking for signs of milky froth which indicates water in your oil.
I have not ever suffered such ignominy. But I have ministered help to a few bikes that ingested water.
| Attachment | Size |
|---|---|
| Tech Torque- Fitting a snorkel to a R1200GSa.ppt | 1.47 MB |
Thanks for this Andy
I really enjoy doing these ''pearls of wisdom" you post and so far everything you have shown us , has be done by me.....from fitting steel ''hook eyes'' on the top box plate to fitting a live wire for ease of use.
Just to clarify... you have fitted the 22 degree angle permanently to your intake and the hose with the straight section that ''plugs'' into the 22 bend is the packed part. ???
Steve
Yup Steve, the 22º angled bend is glued in place.
The hose with the stub glued on is always packed in the bottom of my soft luggage. When I know of a water crossing on my route I pack it higher.
I also wet the pipe stub with spit to lubricate it just before working it into the pipe.
Your bike will not even know it is riding in the water.
A little useful hint i can offer after doing this exercise..................soak the air intake side of the BMW air funnel (the black one) in a cup of boiling water for ten minutes and the 40mm PVC pipe goes in a little easier, otherwise its pretty tight. (This is if you want to make it a permanent fitting like i did)
I used a standard 45 degree 40mm PVC bend . I also cut about 5-6mm off the black funnel where the inside bend of the PVC fiiting touches the funnel to get it to sit deeper thereby ensuring i had a gap between the fuel tank and the pvc fitting.....i didnt want it to rub against the fuel tank.
I will bring my snorkel on the ride on Saturday so people can see it fitted and how easy it is.


